The things we do for love: part 1

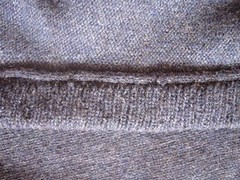
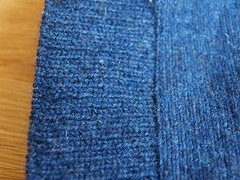
It only took one bad cold, one week on the sofa and 4 seasons of Buffy, but the armbands on Steven’s cashmere jumper are finally done.

Mended cashmere jumper

Lots and lots of 1×1 rib at a very, very small gauge got very, very boring but I’m really pleased with the results.

Mended cashmere jumper

I ended up doing twice as much ribbing as I had originally planned. A single layer seemed a little flimsy so I knitted out to twice the required length, folded the bands over and sewed them down. Rather than casting off and then sewing the cast-off edge down, I just sewed the final row of stitches down from straight off the needle, which saved a lot of time and gave a much neater finish.

Mended cashmere jumper

I am thinking of putting together a tutorial on how I worked the edging but it will need to wait until I am feeling better!

Quilts at the V&A

Despite living in London and being surrounded by posters advertising exhibitions and events that I want to attend, I’m very bad at actually getting around to going places. I did however manage to go and see Quilts: 1700 – 2010 at the V&A before it closed at the beginning of July.

As a beginner quilter with just a single patchwork block under my belt, I was inspired, over-awed and somewhat reassured by the exhibition. If it took 17 years for an eighteenth century master tailor to complete a quilt in just his evenings and weekends, there is hope for me yet. (We won’t talk about my reaction to the beautifully embroidered map of the English counties that had been completed by a nineteenth century 10 year old.)

I preferred the older quilts in the exhibition, those that were produced as quilts rather than as “Art”. I love modern art but apparently not when I go to see a textile exhibition. I think my favourite though was one of the modern ones, “Punctuation” by Sarah Impey. There’s a picture of it in this article or you can view more of Sarah’s work on Quilt Art. Given my blog name, it probably doesn’t come as a surprise that my favourite combined both words and stitches!

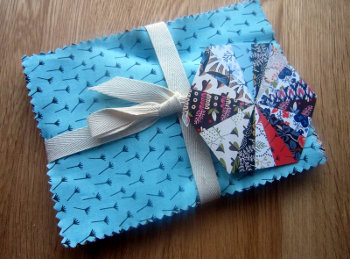
At the time of my visit, I resisted the urge to buy anything from the shop but, as you may have guessed from the pictures, that didn’t last. As a treat for myself for passing another actuarial exam (11 down, 4 to go!) I bought a pack of quilting fabric. The fabrics are limited edition prints created for the V&A by Liberty based on details taken from some of the exhibited quilts.

The pack I bought has 36 pieces in 18 patterns and while I have absolutely no idea what I’m going to do with them yet, they’re certainly brightening up my dining table!

Expanding my craft library

It’s getting harder to find decent second-hand bookshops in central London these days so we recently took a trip to Hay-on-Wye to satisfy our cravings.  I spent a fair amount of time rummaging through any craft books I could find and managed to pick up a few interesting additions to my library. I plan on writing fuller reviews once I’ve had the chance to read them more carefully and try some projects but here’s a quick look in the meantime.

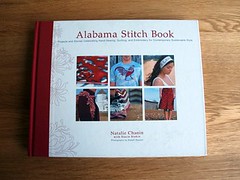
Alabama Stitch Book, by Natalie Chanin with Stacie Stukin:

Alabama Stitch book

A collection of sewing projects for recycling and embellishing old t-shirts. I first heard of this book when the House on Hill Road blog reviewed the follow-up book Alabama Studio Style. Having now seen this book and the review of the second one at House on Hill Road, I think the projects in the second book are probably more to my taste but there are a couple of projects in here, including a skirt and corset top, that I do really want to try. All I need now are some t-shirts!

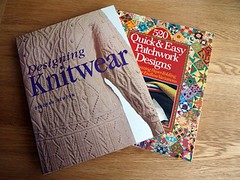
Designing Knitwear, Deborah Newton:

I’ve been getting more ambitious with my designing (I currently have a couple of lace shawls in progress) and my eventual ambition is to learn how to design clothing. I had seen this book recommended as a good guide to knitting design and, at a first glance, it certainly seems to cover everything you could want to know. In fact, at first glance, the sheer quantity of text and detail in this book is a little overwhelming. I think this is going to be a book that I sit down and read through rather than dipping in and out of. I’ll let you know how that goes later.

Second-hand craft books

520 Quick and Easy Patchwork Designs, Kei Kobayashi:

The concept behind this book is simple: using folded origami squares as the basis for quilt designs. Take your square of paper, fold your shape, unfold the paper and use the geometric pattern of crease lines as the basis for your quilt block. My quilting has yet to progress beyond simple patchwork blocks but there’s a wealth of inspiration in here for anyone from the absolute beginner to the expert looking for something new. There is a large section on traditional American quilt block patterns, as well as variations on geometric patterns and some Art Deco and computer graphic suggestions as well. It is a design book rather than a how-to-quilt book so if you’re looking for detailed guidance on quilting, piecing and finishing quilts, this isn’t the book for you but if you’re looking for inspiration, there’s plenty of it here.

Make-do and mend – recycling a knitted jumper

Steven discovered recently that two of the smart (shop-bought) jumpers he owns have holes in the elbows.We didn’t spot them until they were well past my darning abilities and I was loth to darn them anyway because both jumpers have a hole in exactly the same place, meaning that any repair would probably wear through again quite quickly.

Steven wasn’t particularly keen on my idea of sewing suede patches on, explaining that even when he was a physicist working at a university he didn’t wear jumpers with elbow patches, but did suggest that I could unravel the jumpers and re-use the yarn. As can be seen from the label in the picture below, this was a very appealing idea.
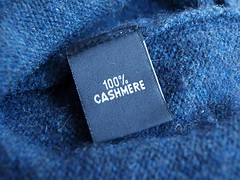
Label showing '100% cashmere'

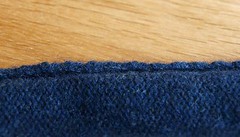
The first step to recycling a jumper to reclaim the yarn is to check the seams. Machine-made jumpers can be manufactured in two different ways. The first is the same as hand-knitting; the pieces are knitted to the appropriate size and shape, and then sewn together — this is ideal for unraveling as you will end up with a single, continuous length of yarn. The second is known as “cut-and-sew”. The fabric is knitted in a single large piece and then the pieces are cut out and sewn together. Unraveling a jumper made this way will result in a lot of short, individual pieces of yarn, which aren’t much good for anything. (Depending on the fibre, you could still recycling these jumpers by felting.)

The picture below is my attempt to show you what a “good” seam for unraveling looks like; it might be better to take a close look at some hand-knitted garments to get the idea.
Recycling a cashmere jumper

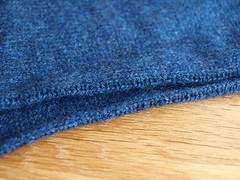
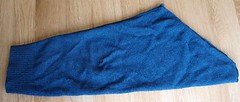
The next step is to unpick the seams; a sharp seam-ripper is useful but be careful not to accidentally cut the knitted fabric. The pictures below show the under-arm section of the body and the sleeve with the hole after it had been removed.
Recycling a cashmere jumper

Recycling a cashmere jumper

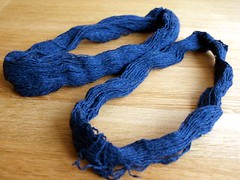
After unraveling, I washed and dried the yarn to get the kinks out. I had wound the into balls as I was unraveling but wound these into hanks for washing and drying. I hung the hanks to dry and hung weights from the bottom to stretch them slightly to straighten the yarn.
Recycling a cashmere jumper

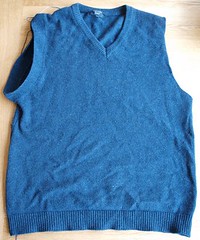
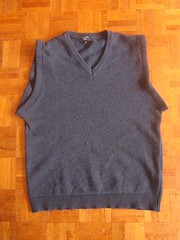
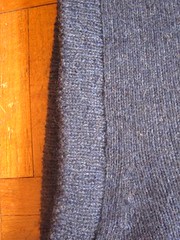
It occurred to me after I had removed the sleeves (and fortunately before I had unraveled anything else) that the rest of the  jumper was still in great condition and that it could work well as a tank top, if I knitted some bands around the armholes. Now that I had a large quantity of matching yarn, I experimented a little with needle sizes and stitches, picked up a lot of stitches round the armhole and started knitting.
Recycling a cashmere jumper

I’m really pleased with the results; but K1P1 rib takes a very long time with such fine yarn on 2mm needles. Hopefully it will be finished by the autumn since it’s too warm to wear it just now anyway.
Recycling a cashmere jumper

The best bit is that, even when the armbands on this jumper are knitted, I still have another jumper to unravel (it has a round neck so can’t be turned into a tank top) plus nearly 100g of yarn from the sleeves on this one. That’s enough laceweight cashmere to keep anyone happy for quite a while!
Vintage sewing machine adventures: part 3 — the other bits

As a child, I loved rooting through my mum’s sewing basket trying to work out what all the different bits and pieces were and how they were used. No matter how much time I spent looking through that basket, there always seemed to be something that I hadn’t seen before.

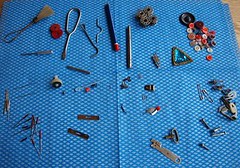
Contents of the drawer

That’s why when the salesman in the junk shop showed me that the sewing machine table drawers were filled with attachments for the machine and other craft-related paraphernalia I knew I had to buy it. I’ve already talked about the sewing machine parts but here are some of my other favourite bits.

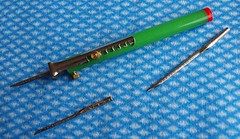
Punchcraft tool — If it hadn’t been for the fact that my mum used to have a couple of punchcraft kits, I might never have worked out was this was. Punchcraft is a way of creating pictures on fabric by “punching” yarn or thread through the fabric to create little loops. (It turns out that the tool can also be used to make holes in leather treadle belts when repairing vintage sewing machines.)

Punchcraft tool

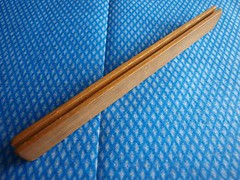
A Turkey Rug Wool gauge — used for cutting lengths of wool to the right size for rug-making. You wind the wool round and round the gauge and then your scissors or knife slide down the groove to cut the lengths. I’ve never tried rug-making so I’ve no idea what you do after that!
Turkey Rug Wool Gauge

Turkey Rug Wool Gauge

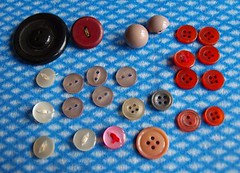
Buttons — none that are particularly exciting but you can never have too many buttons!

Buttons

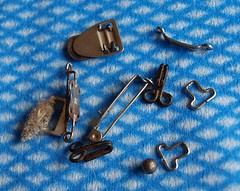
Hooks, clasps and pins — I love that some of these (and some of the buttons) have small pieces of fabric attached, showing that they’ve been saved from old clothing.

Hooks and clasps

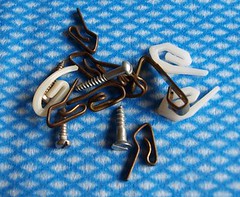
Screws, picture hooks and curtain hooks — It’s always reassuring to see that other people end up with weird collections of DIY oddments in their craft stuff.

Assorted screws and picture and curtain hooks

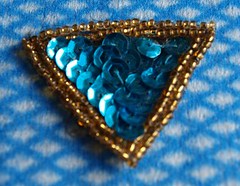
Blue sequinned triangle — part of a fancy dress costume, perhaps?

Blue sequinned triangle

Blowing my own trumpet – but just a little

I’m not very good at self-promotion. It’s been suggested to me in the past that Scots can be “a bit backwards about coming forwards” and, while I wouldn’t like to comment on the general application of the statement, it describes me to a tee.

However, the whole point of publishing things is to share them with other people and, in a previous post, I promised to share all my publishing news so here’s the full run-down of what I’ve been up to publishing-wise and a sneak preview of what is to come.

There’s been both self-publishing and non-self-publishing so let’s start with the stuff that other people have published.

In the other post, I talked about Theresa, which was actually the second pattern that I had published in The Fibertarian; the first was my Stylish Squares blanket in their Winter 2009 edition. This was my first ever published-by-someone-who-wasn’t-me pattern and both the submission process and the publication were more than a little nerve-wracking but so exciting that I was determined to do it again, which I promptly did in their Spring 2010 edition.

p9271211.jpg

Those of you who clicked on the blanket link will have realised that it doesn’t take you to The Fibertarian site, it takes you to Yellow Ginger Designs instead. I decided that I wanted to keep a certain amount of distance between this blog (personal) and my publishing (public) and so I started Yellow Ginger Designs. The name comes from the beautiful yellow ginger plants that we saw in Hawaii. We later learned that they were actually an imported pest that the state is trying to eradicate completely but I still think they’re beautiful! (Unfortunately, the design of the site doesn’t currently live up to the beauty of its name but pretty-ing it up is definitely on my to-do list.)

Yellow Ginger

Yellow Ginger Designs will have all my self-published knitting patterns as well as sewing and other craft projects. At the moment, it’s mostly knitting patterns but I have some sewing projects and craft tutorials that just need some decent photographs before they can go up. Everything is free at the moment, but I do plan on adding a “for sale” section in future. Everything that is currently free will remain free and there will continue to be free content added.

I’ll continue to blog about craft stuff in general on this blog but any patterns or tutorials will be published over there. I will probably mention here when I’ve updated the other site but I can guarantee that, given my dislike of promotion, this blog won’t be turning into a constant stream of advertising!

Book review – Pattern Sourcebook: Japanese Style

A post-exam wander around the craft and design sections of the bookshops on Charing Cross Road today turned up a wonderful little volume entitled “Pattern Sourcebook: Japanese Style. 250 Patterns for Projects and Designs.” The book is a collection of Japanese pattern designs in nine different categories, including plants, creatures, geometry and, of course, waves.

Wave pattern

The book comes with a CD with JPEG and PSD versions of each of the patterns and, best of all, purchasing the book permits unrestricted use of any of the patterns for any purpose whatsoever without any further fees or need for acknowledgement or credit. Many of the patterns are set up so that they can be tiled in all directions.

Japanese cherry blossom pattern

There is a sentence or two accompanying each design with a short explanation of its origin or symbolism. The translation from Japanese is a little quirky at times but not enough to be distracting.

Japanese geometric pattern

The patterns are purely patterns and no instructions are given on how to use them but I’m already in danger of being overwhelmed by ideas for ways to incorporate the designs into knitting and quilting patterns.

Wave pattern

To sum up, if you’re interested in Japanese patterns and styles or just looking for a new source of inspiration, I can highly recommend this.

Details

  • Title – Pattern Sourcebook: Japanese Style
  • Author – Shigeki Nakamura
  • Publisher – Rockport Publishers

Home economics was never like this

The last time I took any sort of organised sewing class was back in High School. I enjoyed my home economics classes and still have some of the things that I made (including an elephant whose ears I sewed on upside down) but I wouldn’t be in a hurry to go back and do them again.

Unlike the class that I attended last night. Under guidance from Steven, his mum bought me vouchers for the Make Lounge for my birthday. To quote their website:  “The Make Lounge offers contemporary craft workshops with a stylish, social twist – perfect for embracing the ‘make do and mend’ ethic in a fashionable way!”

I took one of their intermediate sewing classes, the zippers clinic. We learned how to sew in regular zips and invisible zips and then made a little zippered oilcloth pouch. Here’s mine:

pa131283.jpg

And with the zip open, just to prove it works:

pa131284.jpg

There were wine and nibbles on hand and the atmosphere was fun and friendly. I had been a bit nervous about turning up on my own but I had a brilliant evening. I had enough vouchers for two classes so I’m already booked on the reversible handbag class next week and I can’t wait!

As well as their sewing classes, they offer crochet, jewellery-making, needle-felting, leather-working and lots of others with even more being added all the time. I realise I might be starting to sound like an advert but I promise I have no connection with them other than being a very satisfied customer!

P.S. I still haven’t finished the last two Double Vision squares and here are a couple of sneak peeks at why:

pa131286.jpg

pa131287.jpg

What I did on my holidays – Part 4 – Hawaiian Quilting

So I didn’t actually do any quilting on holiday but I certainly learned a lot about how it’s done in Hawaii. As you might expect, quilting is a not a native craft in Hawaii but was imported by missionaries.

Despite huge amounts of temptation, I managed to restrain myself and came back with only two books on the subject. Unfortunately, I also managed to resist the urge to go into any of the many fabric shops we saw so I don’t have any beautiful Hawaiian fabrics to show you.

p9121186.jpg

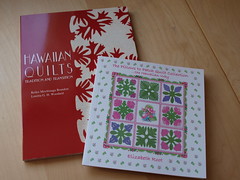
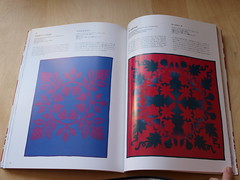
The first book is Hawaiian Quilts: Tradition and Transition. A bilingual (English and Japanese) book that was written to accompany a touring exhibition of vintage and modern Hawaiian quilts. It has a good description of the history and progression of quilting in Hawaii right up to the modern day but my favourite section  is the beautiful pictures of the quilts that formed the exhibition. Some of the vintage quilts can be seen online at the Bishop Museum website or there’s a glimpse of two of the modern ones below.

p9121187.jpg

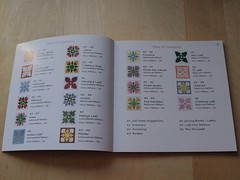
The second book is The Pillows to Patch Quilt Collection: The Hawaiian Way. It is a beautifully illustrated quilt pattern book full of quilt squares and applique patterns based on Hawaiian motifs. Other reviews say that the instructions are clear and easy to follow, even for beginners, but I will report back after my exams when I actually have time to try them.

The picture shows a section of the table of contents. I’m already enjoying planning a quilt with this book; I just hope making one is as much fun!

p9121189.jpg

A new hobby

Because what I need right now, obviously, is another hobby.

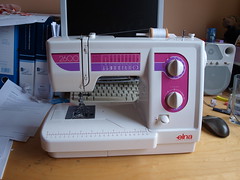
It was my birthday at the end of August and I used my birthday money to buy the sewing machine that I’ve been craving for ages. Actually, I’ve been wanting a sewing machine since my last one broke, which was about 20 years ago now! (It was a toy machine but did actually sew things.)

And here it is:

p9051167.jpg

It’s an Elna 2600 and I love it to pieces.  Especially since I’ve just completed my first project on it.

p9051166.jpg

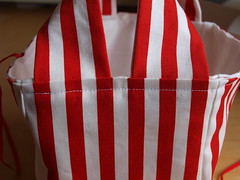
The project is a sock-knitting project bag. I don’t knit socks that often but I couldn’t resist Crazy Lanea’s tutorial and I’m glad I didn’t because the finished bag is one of the most adorable things I’ve seen.

p9051163.jpg

The tutorial was really easy to follow and the whole project took less than 2.5 hours. I even made sure I matched up the stripes:

p9051164.jpg

The ribbons are actually re-purposed hanging loops from a t-shirt. I cut them off because they kept showing when I wore the t-shirt and they turned out to be the perfect colour match for the fabric.

The fabric is all from IKEA. I picked up some bits and pieces when Steven and I were there earlier in the week.

p9051160.jpg

The red and white stripe is called Sofia, the plain white is Lenda and the brown geometrical is Petronella. Between the three lots I ended up with 5.5m for less than £18. The red-and-white and plain white are for experimenting with, I’m going to try and make a more useful container for my interchangeable needle tips, and the brown geometrical is going to be covers for some seat pads for our dining chairs since it matches the fabric table runners that we already have.

Now I just need to work out how to fit in sewing time along side work, studying, knitting, crocheting…..