Two at a time!

Two at a time!

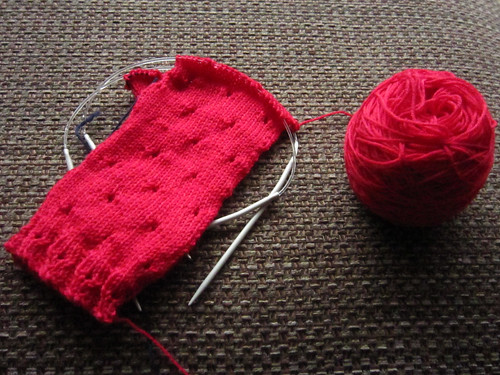
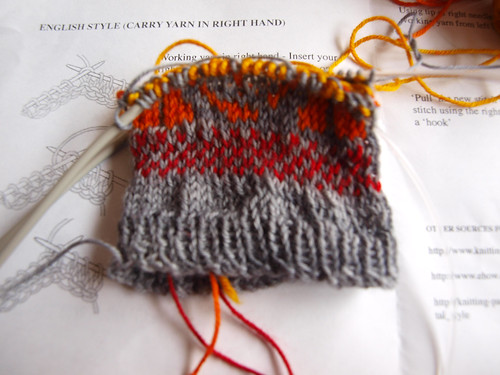
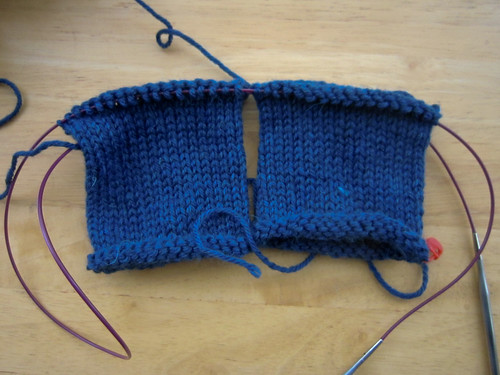
It’s two things, on the same needle, being knitted at the same time! (I may be unreasonably excited about this.)

I’ve wanted to learn how to knit two-at-a-time for a while now. Since I seem to have turned into a sock knitter (and designer) despite my early reservations, the idea of being to knit two identical socks held a lot of appeal. While it would probably have been possible to learn from the internet, sometimes it’s just easier and more fun to take a class.

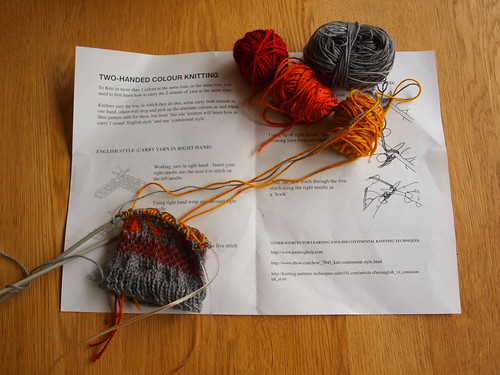
Which is why, two weeks ago, I took a Two-at-a-time Anything workshop taught by Clare Devine at Ginger Twist Studios in Edinburgh. It was my first time at the shop which is absolutely tiny yet still somehow stuffed with a beautiful range of yarns (also available from the website) without being so stuffed that you feel overwhelmed. The advantage of the shop being tiny is that workshop numbers have to be small so there were just four students which meant plenty of opportunities to ask questions or get one-on-one help from Clare. However, as it turned out, we didn’t really need much of that. After some initial hiccups at the casting-on stage (which led to much discussion about how to avoid accidentally knitting with the tail when using a long-tail cast-on), we all seemed to settle into the natural logic and rhythm of knitting two things at the same time and the workshop turned into more of a tea and chat while knitting session which was also great.

The workshop project was a pair of armwarmers (really just two stocking stitch tubes) although the notes do include a pattern for a pair of socks with full instructions on how to manage adding heels and toes when working two-at-a-time. I’m undecided as to whether to just cast off the armwarmers as they are or whether to try adding a heel to them for practice. They’re a bit narrow for me to wear as socks but I might be happy to sacrifice the yarn for the sake of expanding my knowledge of the technique. On the other hand, it’s not very warm today and a new pair of armwarmers might be just the thing!

Don’t tell the bride! (or how to fix a rip in a lace shawl)

After the wedding, I “borrowed” the veil to wash it, reblock it and take some better pictures of it since I hadn’t had time for those before I had to get it to the bride. I’m really glad I did because I found this:

Fixing lace shawl (II)

That, my friends, is a rip: one cut or snapped thread and two unravelled rows. I did see one of the guests get her bracelet caught in the veil when she hugged my sister so I think the thread was either snapped or weakened at that point and it was just very lucky that there wasn’t a bigger hole by the time it was spotted.

After an initial moment of panic, I caught all the loops that I could see with safety pins to prevent anything unravelling further:

Fixing lace shawl (I)

Then I put the shawl aside for 24 hours while I gathered the courage to tackle the repair.

The next evening I sat down with a glass of wine and some chocolate and started researching how to repair lace shawls. I was surprised to find that there’s very little information out there. Endless tutorials and videos on how to repair mistakes in lace as you’re knitting it and references to a couple of books that might have more information: Margaret Stoves’ Wrapped in Lace (available in hard-copy but not electronically and wouldn’t be with me before I had to return the shawl) and Elizabeth Lovick’s Magical Shetland Lace Shawls to Knit (due to be published September 2015) but almost nothing that could help right there, right then.

What I did find was a very old Knitty article on general knitting repair which helped me figure out a plan.

I had two missing rows of knitting and had the loops of the stitches in the row above and row below these. For one of the missing rows, I had the unbroken strand of yarn that should form the loops of that row but the strand for the other was the strand that had snapped. I was also lucky that the sections of the two rows that had unravelled were basically stocking stitch so there wasn’t any complicated lace patterning to be recreated.

Tackling the easier problem first, I used a crochet hook to re-form the stitches using the unbroken strand pulling the strand through each of the loops in the row below in turn and placing the newly formed stitches onto a holder.

For the other row, I grafted the stitches that I had just made with the crochet hook to the loops of the row above using Kitchener stitch with a length of spare yarn and a sewing needle. I tried to make sure when I was securing the ends of the new yarn that I also caught the ends on either side of the section of yarn that had split so that it wouldn’t unravel any further.

Fixing lace shawl (III)

The finished repair isn’t perfect. I should possibly have added an extra horizontal strand as described in the “Tears and holes — weaving method” section of the Knitty article before grafting. However, you have to look quite carefully to find it and it won’t be visible when the shawl is used.

Fixing lace shawl (IV)

Also, the shawl already has quite an “antique” feel to it (lots of the wedding guests couldn’t believe that it was finished less than 72 hours before the wedding and not decades earlier) so a small repair absolutely isn’t out of place in an item that is hopefully going to be a beloved family heirloom.

I also hope that if you’ve found this post because you’re looking for the same help that I was that it has been useful!

Once in a lifetime*

164,000 stitches + 1500m of silk thread + 350 hours of work = one cobweb-weight wedding veil and a delighted bride.

Nicki's Wedding Veil

I’m so pleased with how this turned out. It was an insane amount of work and it isn’t perfect but it is beautiful and everything I hoped it would be.

Nicki's Wedding Shawl (finished)

Remember those stitch patterns that I claimed would really “pop” after blocking?

Close-up of Nicki's wedding shawl

Speaking of the blocking, it turned out not to need to be painstaking after all. A simple wash and stretching out was enough to let the stitch patterns shine. I could have pinned out the edges to get a more even circle but the slight unevenness doesn’t show at all when the shawl is worn.

Nicki's Wedding Shawl (blocking)

The shawl is now destined for life as a family heirloom. It’s somewhat impractical for every day use but will make a beautiful christening shawl when the time comes.


* I like to stay positive on the internet, which is why this post’s title is “Once in a lifetime” and not “Never again under any circumstances whatsoever”.

Under pressure

There are approximately 11 days, 23 hours and 18 minutes until my sister’s wedding. The ivory-coloured blob in the picture below is intended to be her veil. In theory, there are the equivalent of about 14 rows of knitting left to do including the cast-off which, at the speed I’ve been averaging on this project, is about 12 hours of knitting. However, there are also a number of dropped stitches and other mistakes that need to be corrected (anywhere you see a safety pin in the pictures) and then there is the blocking which is going to be long and painstaking. Did I mention that I’m working full-time for 8 of those 11 days and that I’ve been asked if the veil can be ready for the Tuesday night before the wedding so that my sister can try it with her dress so really there are only 9 days (of which I’m working 7), 3 hours and 18 minutes? Or that I would really quite like to add another couple of repeats of the final pattern to make it just slightly bigger? It’s do-able but I’m definitely feeling the pressure.

Nicki's Wedding Shawl (in progress)

The stitch markers are probably my favourite thing about this project. They’re from fripperies and bibelots on Etsy and come in a delightful little metal tin. These are the “ringOs Mini”and I can confirm that they are absolutely snag-free. They are slightly too big for the needles and yarn that I’m using but that’s because I’m using smaller yarn and needles than any sane person should ever use to knit a garment for an adult. The sets are sold in a variety of colours but the sock knitting sets include “traffic light” markers for marking particular sections of the pattern which I’m using as a visual guide to how far through each round of knitting I currently am. Green marks the first third, amber the middle third and red means that I’m in the home-stretch and need to watch out for the end of round marker to switch to the next row of the pattern.

Stitch marker

Speaking of smaller yarn and needles than any sane person should use: the yarn is SS60 Pure Silk from Texere Yarns (3000m per 100g cone) and I’m using 1.75mm Knit Pro needles. My mum (who is probably even more stressed about this project than I am) keeps telling people that “the yarn is so thin, it’s almost like thread” to which I keep pointing out that technically it is thread! (The picture below shows a strand compared to a UK five-pence piece and a US 1-cent coin.) It is knitting up beautifully though. The stitch marker picture above really captures the sheen and softness that the finished veil will have.

Yarn thickness

The pattern is my own design and incorporates elements to represent the bride, the groom and their relationship. The centre of the shawl has rings of yarnovers to represent the wedding rings. Then there are shamrock leaves (Irish groom) and thistles (Scottish bride):

Wedding shawl stitch patterns

There are mountains (which is where the proposal took place):

Wedding shawl stitch patterns

And, finally, hundreds upon hundreds of little love hearts:

Wedding shawl stitch patterns

I realise that I may be the only person in the world who can currently “see” those elements but I did swatch and they will really pop after blocking (remember when I said the blocking was going to be painstaking?). My sister wanted a shawl/veil that was “just for her” so I won’t be publishing this as a for-sale design at any point but I will put some extra details on a Ravelry project page once it’s done.

Check back in about two weeks’ time for post blocking pictures, hopefully including action shots from the day!

Easy like Sunday morning

I enjoyed a thoroughly domestic Sunday morning this morning. Not pictured: my cup of coffee and a plate of crusty bread spread with home-made elderberry jam.

Sunday morning

Today is my last day of a week’s holiday before going back to work tomorrow and I’m squeezing in as much relaxation as is possible. My day-job got particularly stressful round about last July and has pretty much remained that way ever since. This week has been my first proper break of any length since then and it’s turned out to be just what I needed to start feeling more like me again.

In fact, I’ve been feeling so little like me that the pair of socks I cast on for the Indie Design Gift-a-long only got finished on Friday since the cable pattern has just been too complicated for my tired brain to knit. (Which is more a reflection of how tired my brain has been since the pattern isn’t really complicated so much as hard to memorise which means lots of checking of charts.)

The socks are Kilworth by that bald guy knits.

Kilworth socks

I made a few minor mods to the pattern (noted on my Ravelry project page), mostly to do with the direction of the cable crossings, but otherwise these are pretty much knitted exactly as written. I did re-chart the pattern since I didn’t really like the way the pattern was laid out in the PDF. I hate having to flick backwards and forwards between several charts and the written instructions on a single round (particularly in electronic patterns) so I created new charts that included both my mods and all the cable charts in a single place.

Kilworth socks

I love the finished socks though which is just as well because Friday was the day that a series of British Gas repairmen proceeded to make our central heating problems worse rather than better so the socks are getting a lot of wear already.

Finishing them has also inspired me to start the other project pictured in the first photograph. These are Mirri mitts by ambah. I bought the Mirri collection during the Indie Design gift-a-long as well but, due to the aforementioned lack of knitting over this winter, totally failed to cast on during the gift-a-long never mind finish them.

Mirri mitt in progress

These are proving to be a fun, quick knit. The yarn is Bonny from The Yarn Yard in Stoplight and is such a cheerful colour that it’s making me smile even as the rain lashes against the windows of my currently unheated house on this rainy February morning. I might even manage to get them finished today so that they can cheer me up on my commute to and from the dreaded first day back at work tomorrow!

Indie Design Gift-a-long and pattern sale

Apparently, there are people out there who are already contemplating their Christmas shopping and crafting (not me — I’m in total denial about the fact that it’s already November). So, a group of independent designers decided to get together and help make Christmas knitting and crocheting a bit more fun and exciting!

The fun comes in two parts. First: a sale. Use the code “giftalong” on Ravelry between now and midnight on 15 November to get a 25% discount on a huge selection of patterns from more than 100 indie designers.

Second: a giant knit/crochet-a-long in the Indie Design Gift-a-long group on Ravelry. Cast on for any of the participating patterns between 1st November and 31st December and join in the discussion on the group forum board for chances to win some great prizes. (If you already have a copy of one of the participating patterns, you can still take part in the knit/crochet-a-long, just so long as you cast on for the project on or after 1st November.) You don’t need to finish your project before 31st December to be in with a chance of winning (says the person who frequently doesn’t finish her Christmas knitting till January) but it will increase the number of prizes that you’re eligible for.

All of my self-published patterns listed below are included in the event.

Strawberry shawlOren shawlWaterlilies shawl
Southwark Spire socksIrish Stout socksReal Ale socks
Celandine shawlKentigern shawlThe Hill House scarf

If you’re interested in patterns from a particular indie designer (other than me!) check out the full list of participating designers to see if they’re taking part.

Alternatively, take a look through the Participating patterns thread to see if anything catches your eye.

The really good news is that gifts for yourself are eligible for the discount and prizes too so even if you’re not planning on giving anyone else a knitted or crocheted gift this year, why not treat yourself!

Glasgow School of Yarn 2013

It was the Glasgow School of Yarn this weekend and as usual it was chock-full of interesting classes, beautiful yarn and lovely people.

I attended the Two-handed Colourwork class taught by Jon of Easyknits. I originally learnt to knit English-style but I’ve been meaning to learn Continental for a while.

Two-handed colourwork

The class was great. Jon was an engaging teacher and it turns out that learning another style of knitting, while somewhat frustrating, isn’t nearly as hard as I had thought it would be. Being able to hold a yarn in each hand when working in two colours also really speeds up colourwork knitting. Now I just need lots and lots of practice!

Two-handed colourwork

I didn’t have very long to spend in the marketplace and, despite being very tempted by the stitch markers by Owl Print Panda, I came away with just one skein of yarn. This is a skein of Deeply Wicked by Easyknits in the Rude Red colourway. I don’t use red yarn very often but every so often one just speaks to me and this was definitely one of those. I’m already formulating plans for a new sock design using it.

Easyknits Deeply Wicked in Rude Red

In other GSoY news, I finally got around to publishing my Kentigern Shawl pattern that was my entry into last year’s Glasgow School of Yarn design competition.

Kentigern shawl (full circle version)

It was a long time coming but the final pattern containing both the full circle and semi-circle versions is now available on Ravelry.

A “little” bit of knitting

I said in my last post that there had been a little bit of knitting while I had been offline but looking back I realise that there was actually quite a lot of knitting just not very many projects.

Most of the knitting went into this:

Tweed baby blanket

which is the Tweed Baby Blanket by Jared Flood. The blanket is a modern take (colour-wise) on a very traditional blanket style (garter stitch square knitted on the bias with a feather and fan border).

Tweed baby blanket

I’ve been wanting to knit one of these for a long time but, given the cost of the yarn and the effort involved, I was waiting for a good excuse. Becoming an aunt for the first time at the end of April was the perfect excuse!

Tweed baby blanket

I used Rowan Felted Tweed DK on 4.5mm needles, which gave a nice drape to the blanket and enough openness to the lace border that I didn’t have to block it. The Felted Tweed is machine washable (which I insist on for baby presents for new parents – they’ve got enough to worry about without worrying about hand-washing woollens). After knitting, I washed the blanket in the machine and then just laid it flat to dry.

Tweed baby blanket

I have mixed feelings about the Felted Tweed yarn. I love the colours and the finished blanket is lovely and soft and squishy. However, it sheds a lot even after washing. After knitting with it, my clothing looked like I had been sat on by a small, white hairy dog. As much as I love the finished result, I will need to think very carefully about whether I use the Felted Tweed again in future.

For now, I have to get this blanket posted off before I decide that I’m keeping it for myself!

Winter of socks – part III

The second sock syndrome was even worse than I feared. Not only did it take me four attempts to get started but it then took me four attempts to knit the heel. Four seemed to be the magic number though and all was well after that:

Real Ale Socks

(Technically, this is the same picture of the first sock that I showed before but the second one does look exactly the same, honest!)

So now it’s time for a pair for me. I’m making me a pair of my Southwark Spire Socks, since I don’t actually have a pair due to having left one of the sample pair on a train.

Southwark Spire socks

The yarn is from The Yarn Yard and is their Bonny sock yarn in “Matelot”. I wanted something similar to the blue that I knitted the samples in and I had heard lots of nice things about Yarn Yard yarn so thought I would give it a go. It is 75% wool, 25% nylon so should be perfect for socks.

Yarn Yard Bonny sock yarn

I’m really pleased with how it is knitting up so far: the stitch definition is lovely and the subtle variation of the semi-solid is just enough to be really pretty without overpowering the pattern at all. Fingers crossed that this pair isn’t as much trouble as Steven’s socks were!

Winter of socks – part II

It’s been nearly three months since I posted about how I needed to knit Steven and me a lot more socks. Unfortunately, despite a lot of sock-related activity (two new patterns and a book review) I’m sorry to say that I haven’t completed even one pair that we can wear.

I have finished the first of a pair of my Real Ale Socks in Regia 4 ply for Steven but I seem to be suffering from a particularly extreme form of second sock syndrome.

Real Ale Socks

Second sock syndrome usually applies to a knitter’s reluctance to knit a second sock due to the repetitive nature of knitting a second item that’s identical to the one you’ve just finished. In my case, the spirit is willing but the flesh appears to be weak. What you see here is my fourth attempt to knit the second sock of this pair:

Second sock

The first three attempts have fallen foul of bizarre combinations of casting on the wrong number of stitches, working the wrong type of rib for the cuff and twisting the cast-on. I would cross my fingers that I’m past the worst of it but I don’t think that’ll help with the knitting!